In this last instalment of my series on the 6522 VIA we'll use a little more hardware to show how to generate analog waveforms using a simple digital to analog converter.
You can read all about the theory of digital to analog conversion elsewhere (such as here ). In our example we'll use a simple digital analog converter called a resistor ladder, specifically an R-2R ladder.
All we need is some resistors connected to the digital output pins of one of the 6522 VIA ports. With 8 pins we could make an 8-bit D/A converter, or even a 16-but using both ports, but to simplify the circuit I'll just use a 4-bit ladder. That will require 8 resistors. The basic circuit is shown below.
 |
| 4 Bit Resistor Ladder |
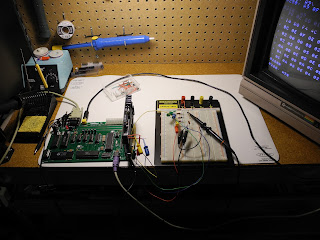
I chose to use R = 10K (or 10,000 ohms). I used standard resistor values of 12K and 20K for R and 2R. The four low order pins of the 6522 VIA port A are used. It was quickly wired up on solderless breadboard.
 |
| Resistor Ladder Circuit on Breadboard |
We can generate various waveforms depending on the values in the table. I chose three common ones. A ramp is a waveform that increases linearly from zero to the maximum value and then repeats. With 16 data samples we simply use the values from 0 to 15. A triangle increases linearly from a minimum value to a maximum value and then decreases linearly back to the minimum. The data samples for this were trivial to choose.
A sine wave is a little trickier. We want to use values corresponding to a sine curve, but we need to scale them to the range of data we have (0 to 15) and round them to integer values. To do this I calculated the values in a spreadsheet. Here are the values in my spreadsheet:
Sample Value Rounded
0 7.5 7
1 10.3701257427 10
2 12.8033008589 12
3 14.4290964938 14
4 15 15
5 14.4290964938 14
6 12.8033008589 12
7 10.3701257427 10
8 7.5 7
9 4.6298742573 4
10 2.1966991411 2
11 0.5709035062 0
12 0 0
13 0.5709035062 0
14 2.1966991411 2
15 4.6298742573 4
The formula for the values was 7.5*SIN(2*PI() * n/16) + 15/2 where n is the sample number. The rounded values are the integer value of these (i.e. the INT() function).
Here is the entire code:
.include "6522.inc"
SAMPLES = 16 ; Number of samples in table
LDA #001111 ; Set low 4 bits of port A to all outputs
STA DDRA
START:
LDX #0
LOOP:
LDA SINE,X ; Get value. Select SINE, RAMP, or TRIANGLE
STA PORTA ; Write to port
NOP ; Can add more NOPS to slow down frequency
INX ; increment index
CPX #SAMPLES ; are we at end?
BNE LOOP ; if not, continue
JMP START ; otherwise restart
; Sine values calculated using spreadsheet
SINE:
.byte 7,10,12,14,15,14,12,10,7,4,2,0,0,0,2,4
RAMP:
.byte 0,1,2,3,4,5,6,7,8,9,10,11,12,13,14,15
TRIANGLE:
.byte 0,2,4,6,8,10,12,14,15,14,12,10,8,6,4,2
You can select which waveform to generate by changing the line
LDA SINE,X ; Get value. Select SINE, RAMP, or TRIANGLE
to use the appropriate table.
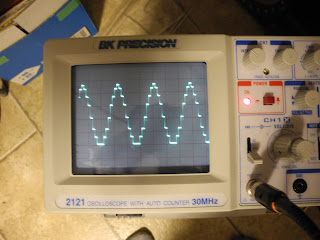
With a 2MHz CPU clock I measured a sine wave of 7.245 KHz. Below you can see the three waveforms displayed on an oscilloscope.
 |
| Sine Wave |
 |
| Ramp Wave |
 |
| Triangle Wave |
How could we extend this further? With more D/A bits we could generate more accurate waveforms. 8-bits is pretty good. CD audio uses 16-bits, which we could do with both VIA ports but we likely couldn't get it running at the 44KHz rate that CD audio uses and we'd quickly run out of memory to store the samples.
You can imagine using this scheme for generating simple sounds. To drive a real device you'd want to add some buffering using an Op Amp or similar. You could then drive amplified speakers, for example.
The code takes all the CPU resources. It could be made interrupt driven, as in the previous article in this series. However, any significant sample rate would take a lot of CPU resources even if run interrupt driven.
I hope you enjoyed this series on the 6522 VIA. There are other features of the 6522 VIA chip, such as the shift register, that we did not explore. I encourage you to study the data sheet and see what applications you can come up with.
I appreciate any feedback on this series and I'd like to hear if you tried any of these experiments yourself.
The source code and Woz monitor binaries for this series can all be found here.

1 comment:
Hey Jeff,
I really enjoyed your series on 6522 VIA experiments. I just built a 6522 prototype board for my Apple //e, and I was able to easily adapt your code and try out all of the experiments. Thanks!
-Chris
Post a Comment